Table of Contents
ToggleThe space under your kitchen sink is prime real estate, it’s already built into your home, it’s accessible, and it’s probably a mess. Between the cleaning supplies, spare sponges, garbage disposal components, and the weird collection of half-empty bottles, the cabinet quickly turns into a black hole where things disappear and nothing fits. But that’s the thing: it doesn’t have to stay that way. With some thoughtful organization and a few strategic additions, you can transform that cluttered void into a functional storage system that actually works. This guide walks you through five proven strategies to reclaim that space, from smart shelving to plumbing-aware solutions.
Key Takeaways
- Assess your plumbing layout and usable space before purchasing storage solutions to avoid wasted money on items that won’t fit around the P-trap and supply lines.
- Pull-out shelves and sliding drawers transform under kitchen sink storage by providing easy access to back items without emptying the entire cabinet.
- Clear plastic stackable containers grouped by item type and labeled clearly maximize vertical space while preventing moisture damage common in under-sink environments.
- Leave at least 2 inches of clearance around all exposed pipes to prevent kinking supply lines and ensure your organization system coexists safely with plumbing.
- Monthly maintenance—checking for leaks, wiping containers, and removing expired products—keeps your under kitchen sink storage system functional and prevents mold and moisture buildup.
Assess Your Current Layout and Identify Problem Areas
Before you buy anything or start rearranging, spend ten minutes really looking at what you’ve got under there. Open the cabinet doors and take a clear-eyed inventory. Look at how much vertical space you actually have, measure from the floor to the bottom of the sink basin or countertop. Check what’s currently taking up the most room and ask yourself if it’s earning its spot. Is there standing water pooling in the back? Are the P-trap and shutoff valve eating up prime storage real estate?
Notice where the plumbing runs. This is critical and often overlooked. Most under-sink cabinets have exposed pipes running horizontally and vertically, the P-trap (that U-shaped piece), hot and cold supply lines, and possibly a dishwasher connection. Don’t fight these: work around them. Mark them mentally or even use painter’s tape to outline the actual usable zones. Many people waste money on storage that won’t fit because they didn’t account for the plumbing in the middle of the cabinet.
Install Pull-Out Shelving and Sliding Drawers
Pull-out shelves and sliding drawers let you access items in the back without emptying the whole cabinet. These aren’t complicated to install, and they make a real difference in daily usability. A typical pull-out shelf kit (usually steel or plastic, around 12–24 inches wide) mounts on the interior sides of the cabinet using L-brackets or sliding rail systems.
Measure your cabinet width and depth carefully. Most under-sink cabinets are 36 inches wide externally, which translates to roughly 33–34 inches of usable interior width. Depth varies, but 18–20 inches is standard. Order a pull-out shelf that leaves 1–2 inches of clearance on each side. Installation usually takes 15–20 minutes per shelf: mark mounting holes, drill pilot holes (use a 1/8-inch drill bit to avoid splitting the cabinet), and screw the brackets or rails into place.
For heavier items like bulk cleaning supplies, look for shelves rated for at least 50 pounds of load. Cheaper options are lightweight plastic and work fine for light items: mid-range steel options are more durable. Avoid over-tightening fasteners in particle board cabinets, use plastic anchors if you can’t hit solid wood studs in the cabinet sides. Test the pull action fully extended before loading it up: you want smooth operation, not binding.
Use Vertical Organization With Stackable Containers
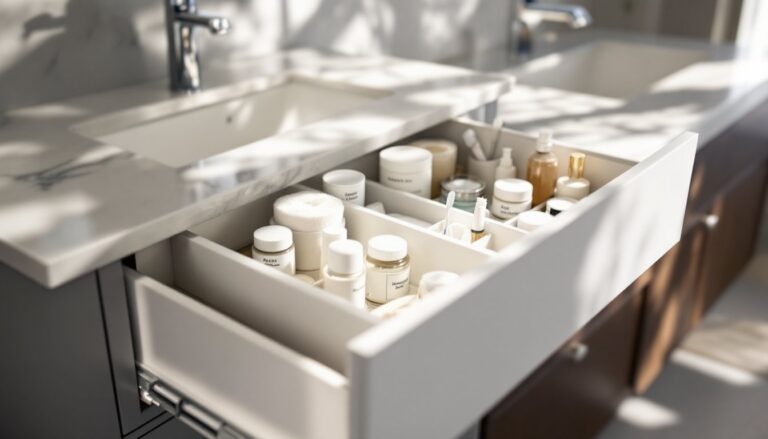
Vertical space in an under-sink cabinet is your best friend. Once you’ve installed a shelf or two, use stackable containers to climb toward the ceiling. Clear plastic bins or stacking drawers work better than opaque ones because you can see what’s inside without pulling everything out. Look for containers that interlock or nest securely, the last thing you need is a stack toppling forward when you reach for something.
Group similar items together. All your cleaning cloths in one container, all sprays in another, all brushes and scrubbers in a third. Label everything clearly with a label maker or waterproof tape. This takes five minutes and saves you 20 minutes of searching later. For under-sink storage specifically, avoid cardboard boxes, moisture and spills will break them down. Plastic is non-negotiable in this environment.
If space allows, consider shallow shelving dividers (around 4 inches tall) to keep items from shifting forward and blocking access to the pipes. Tension rods can work too, install them horizontally between the cabinet sides to create dividers for spray bottles or rolled towels. These cost $3–8 each and require only a quick check that they won’t interfere with your plumbing.
Manage Plumbing Around Your Storage Setup
Here’s the reality: your storage plan succeeds or fails based on how well it coexists with the pipes. The P-trap and supply lines create a maze that won’t move, so your organization has to bend around them. Start by identifying which areas are completely blocked and which areas have just an inch or two of clearance.
If you have exposed hot and cold water supply lines (typically 1/2-inch copper or PEX), they’ll take up vertical space on both sides. The P-trap, that curved pipe under the drain, usually sits in the middle or slightly to one side. Don’t store anything directly against these pipes or you risk kinking lines, breaking fittings, or crushing something that falls and pinches the supply line. Leave at least 2 inches of breathing room around plumbing.
If your plumbing situation is crowded, install cabinet organizers designed to clip around pipes. Some brands make U-shaped rail systems or wire racks that bolt to the cabinet frame and hug the pipes without crushing them. Before installing anything, check for leaks by running the sink and disposal with water for 30 seconds and checking under the cabinet for drips. Fix leaks before you organize: water damage and moldy storage containers aren’t worth it. If you have a water shutoff valve under the sink, make sure you can still reach it easily.
Add Eco-Friendly Storage Accessories
Sustainable storage options are better for the planet and often for your wallet too. Instead of single-use plastic bags, invest in a small collection of reusable cloth bags for storing items like sponges, rags, and smaller supply bottles. These breathe better than plastic, reducing mold and mildew growth, a real problem in damp under-sink spaces.
Bamboo shelf organizers are a solid choice if you’re adding extra shelves. They’re sturdy, moisture-resistant compared to untreated wood, and they fit the natural aesthetic many homeowners prefer. Recycled plastic organizers are another option: brands now make stackable containers from reclaimed materials, which is better than virgin plastic if the price is similar. Cotton or canvas drawer dividers work well for rolled towels and cloths instead of plastic.
If you’re looking for broader storage solutions, Home Office Storage Cabinets: covers vertical organization principles that translate directly to under-sink spaces. The same logic, clear containers, vertical stacking, and intentional zoning, applies everywhere.
Maintain Your Organized Space Long-Term
Organization isn’t a one-and-done project. Set a simple routine: once a month, open the cabinet and remove expired products, wipe down containers, and check for leaks or moisture buildup. If you notice condensation on the underside of the cabinet or pooling water, address it immediately. Poor ventilation under the sink causes mold and deteriorates cardboard, wood, and paper labels.
Expired cleaning products should go to a local hazardous waste facility, don’t pour them down the drain or throw them in the trash without checking local regulations. Empty bottles and spray containers can be recycled: rinsing them out takes 30 seconds and keeps your storage area smelling fresh. When items run low, reorder or replace them promptly so you’re not staring at empty containers or, worse, accidentally buying duplicates.
Keep a small notebook or note on your phone with a quick inventory of what’s stored there and where. Sounds fussy, but it prevents the “I thought we had this” conversations and stops people from buying things that are already under the sink. If you’re using pull-out shelves, test them quarterly to make sure they slide smoothly and aren’t getting stuck by shifted items. A tiny amount of maintenance prevents big frustration later. According to The Kitchn, small but consistent organization habits are what keep kitchens functional year-round.
Conclusion
Under-sink storage doesn’t need to be complicated or expensive. Start with a honest assessment of your space, work around your plumbing rather than against it, and invest in a few key items, pull-out shelves, clear containers, and maybe some vertical dividers. The goal isn’t magazine-worthy perfection: it’s a system that works for your household and actually stays organized. You’ll find that when everything has a home, people use them, and the mess doesn’t creep back in as fast. Take it one step at a time, and you’ll have a functional under-sink cabinet that earns its space.