Table of Contents
ToggleA cluttered workshop kills productivity faster than a dull saw blade. Whether you’re tackling weekend projects or running a full DIY operation from your garage, the right Viper tool storage system keeps your tools accessible, protected, and ready to go. This guide walks you through the best storage options for Viper tools, organization strategies that actually stick, and the setup choices that fit different workshop sizes and budgets. Proper tool storage doesn’t just save you time hunting for that screwdriver, it extends tool life, prevents injuries from tripping hazards, and makes every project feel more professional.
Key Takeaways
- Proper Viper tool storage improves workshop productivity by reducing search time, preventing injuries from tripping hazards, and extending tool lifespan.
- Wall-mounted pegboards and magnetic strips maximize space efficiency in smaller workshops, while mobile carts offer flexibility for multi-room projects.
- Label your Viper tool storage positions and enforce a ‘one home’ rule so every tool has a designated spot, saving critical minutes during projects.
- Group tools by function—fasteners together, drill bits in one container, hand tools at arm’s reach—and use dividers to prevent items from getting lost.
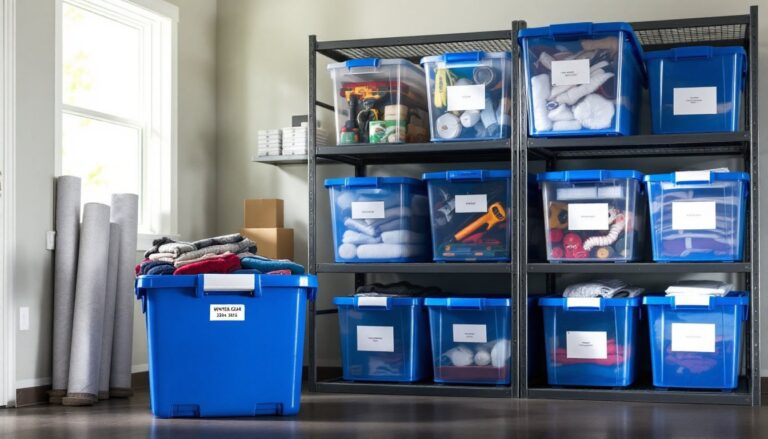
- Store climate-sensitive tools in sealed bins with silica gel to protect against humidity and temperature swings, especially in unheated garages.
- Combine multiple storage methods (wall racks for daily-use items and a locked toolbox for expensive tools) to balance accessibility with security and theft prevention.
Why Proper Viper Tool Storage Matters for DIY Success
A well-organized Viper tool collection is the backbone of any efficient workshop. When tools are scattered across benches, shelves, and drawers, you waste time searching instead of working. More critically, loose tools lying around create tripping hazards and increase the risk of damage, both to the tools themselves and to your hands or feet if you step on something sharp or heavy.
Viper tools, known for durability and precision, deserve storage that protects their investment value. Humidity, dust, and accidental drops can degrade performance or shorten tool lifespan. A dedicated storage system also enforces accountability: you’ll notice immediately when a tool is missing, and you’re less likely to leave expensive equipment out overnight or in an unprotected state.
Beyond safety and tool longevity, proper storage creates mental clarity. When you can see your entire toolkit at a glance and grab what you need without thinking, you move through projects faster and make fewer mistakes. It’s the difference between a workshop that frustrates you and one that supports your work. Whether you’re storing hand tools, power drill bits, or larger equipment, a system that matches your workflow transforms your space and your confidence on the job.
Best Storage Options for Viper Tools
The storage solution you choose depends on your tool count, available space, and how often you need access. Most effective workshops combine multiple storage methods rather than relying on a single system.
Wall-Mounted Racks and Pegboards
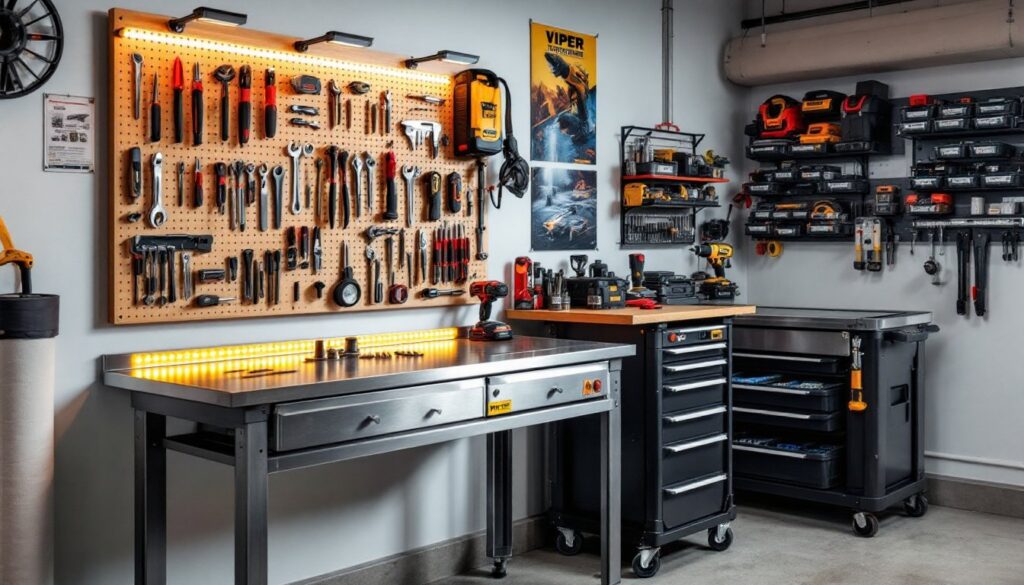
Wall-mounted storage is the most space-efficient option for smaller workshops and makes tools instantly visible. A pegboard (typically 1/4-inch hardboard with 3/8-inch holes spaced 1 inch apart) holds dozens of hand tools while taking up minimal floor space. Pair it with metal or plastic peg hooks and a few baskets or shelves to accommodate Viper screwdrivers, wrenches, pliers, and small power tools.
If you want a cleaner look with more durability, wall-mounted rails and magnetic strips work well for metal tools. A stainless steel magnetic strip mounted above your work surface keeps frequently used bits and metal hand tools visible and instantly reachable. For larger Viper tools like impact drivers or circular saws, wall-mounted steel racks with locking brackets provide secure, organized storage without floor clutter.
When installing wall-mounted storage, locate the wall studs (typically 16 inches on center) and anchor mounting hardware directly into them. Drywall anchors alone won’t support a loaded pegboard, fastening to studs ensures safety and longevity. Mounting height matters too: place frequently grabbed tools at eye level, heavy tools lower, and rarely used items higher up.
One practical tip many DIYers discover the hard way: label your pegboard positions with a permanent marker or printed labels so tools always return to their spot. This takes 10 minutes upfront and saves countless minutes of searching.
Toolboxes and Mobile Carts
Toolboxes range from small, portable units to large multi-drawer chests. For Viper tools, a mid-size toolbox with compartmented drawers works well for hand tools, bits, and small accessories. Look for deep drawers with dividers to prevent tools from sliding around during transport or storage. Steel toolboxes offer durability but add weight: plastic versions are lighter and work fine for home use.
A mobile cart (with locking wheels) is ideal if you move between projects or work in different rooms. A 3-tier cart with pull-out drawers keeps tools organized and mobile. You can wheel it to your project, lock the wheels in place, and access everything without stepping away. Carts work especially well in shared spaces like kitchens during renovations, where you need to push tools aside when not in use.
For serious DIYers with extensive Viper collections, a tool chest with multiple drawers and a locking lid provides security, organization, and a professional feel. Chest designs range from basic plywood units you can build yourself (a popular woodworking project plan) to powder-coated steel models with precision ball-bearing slides. The investment pays off if you store expensive power tools or frequently lend tools to neighbors.
When choosing between toolboxes and wall-mounted options, consider your space. Wall storage uses vertical space and keeps your floor clear, crucial in smaller garages. Toolboxes occupy floor or bench space but offer portability and security (a locked toolbox protects against theft). Many workshops use both: a pegboard or wall-mounted system for daily-use items and a toolbox for specialty tools or backup bits.
Organization Tips to Keep Your Tools Accessible
Storage and organization aren’t the same thing. A well-organized system means you can find what you need in seconds, every time. Here’s how to build that habit.
Group by function. Keep all your fasteners (screws, bolts, nails) together, all drill bits in one drawer or container, and all hand tools (screwdrivers, wrenches, pliers) within arm’s reach. This seems obvious but is easily overlooked when tools accumulate over years. When you reorganize, take 30 seconds to verify you’re not storing duplicates, toss or donate redundant tools.
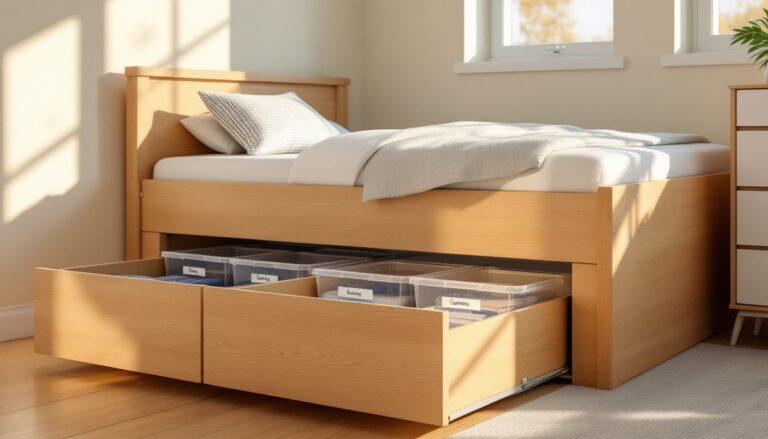
Use containers and dividers. Loose items roll and get lost. Small plastic bins, compartmented organizers, or even repurposed jars keep small fasteners, bits, and accessories grouped. Label everything with a label maker or permanent marker. A one-second label saves you five minutes of searching when you’re mid-project and need a #2 Phillips bit fast.
Adopt a “one home” rule. Every tool gets one designated spot. If you pull a tool, use it, and leave it somewhere else, the system breaks down. This takes discipline but creates massive time savings. Many workshops establish a checkout rule: borrowed tools must return to their spot within 24 hours. This prevents the slow erosion of organization.
Vertical storage maximizes space. Shelving, wall-mounted racks, and pegboards save floor space. A wall 8 feet tall offers far more storage than a 4-foot-wide bench. Recent workshop setup guides from experienced makers show that thinking vertically, using every inch of wall space, often eliminates the need to buy additional storage furniture.
Keep frequently used tools at arm’s reach. Your most-grabbed tools (tape measure, level, a few key screwdrivers) belong within a 2-foot radius of your work surface. Specialty tools and backups go higher or farther away. This reduces fatigue and keeps focus on the work rather than hunting.
Create a “consumables zone. Sandpaper, wood screws, nails, and other single-use items deteriorate with storage and get depleted. Store these in a designated bin or drawer separate from permanent tools. Check and restock this zone monthly. Understanding when to replace consumables, dull sandpaper, rusty fasteners, dried-out paint, prevents wasted time on the job. Resources like home renovation guides often highlight small prep mistakes that derail projects, and half the time it’s using worn-out or wrong supplies.
Climate matters. Moisture and temperature swings degrade tool quality. Store tools in a climate-controlled space when possible. If your garage isn’t heated or air-conditioned, keep sensitive tools (power tools, metal hand tools prone to rust) in a sealed plastic bin with a silica gel packet. This costs almost nothing and extends tool life by years.
Conclusion
A thoughtful Viper tool storage system removes friction from your DIY workflow. Whether you choose wall-mounted pegboards, mobile carts, or a combination approach, the key is matching your storage method to your space, tool volume, and access patterns. Start with your most-used tools, organize them first, and expand the system as your collection grows. A well-organized workspace isn’t a luxury, it’s the foundation of efficient, enjoyable DIY work.