Table of Contents
ToggleA well-organized workshop or garage isn’t just nice to look at, it’s the foundation of efficient, safe DIY work. Whether you’re hanging a shelf or tackling a full renovation, wasting 10 minutes hunting for your 3/8-inch wrench kills momentum and eats into project time. Tool storage ideas have evolved beyond the old milk crate-in-the-corner approach. Modern diy tool storage solutions range from simple pegboards to custom wall systems, and they don’t require a contractor’s budget or advanced carpentry skills. This guide walks you through practical, space-saving tool storage options that’ll keep your hand tools visible, accessible, and protected, so you can focus on the work, not the search.
Key Takeaways
- Pegboards remain the most affordable and flexible tool storage solution, costing $15–$30 and requiring only basic installation with stud-mounted screws for stability.
- Tool storage ideas like wall-mounted racks, magnetic strips, and freestanding cabinets eliminate time-wasting tool searches and keep your workspace organized and efficient.
- Rolling tool chests ($100–$400) and under-bench shelving keep frequently used hand tools accessible without cluttering your work surface during projects.
- DIY tool storage projects—from custom plywood racks ($25) to hinged cabinets—let you build personalized solutions for your specific collection and workspace in under six hours.
- Always anchor wall-mounted storage to wall studs or use heavy-duty toggle bolts rated for 25+ pounds to prevent sagging and ensure tools remain secure and protected.
Wall-Mounted Storage Solutions
Pegboard Systems
Pegboards remain the gold standard for accessible diy tool storage because they’re affordable, flexible, and dead simple to install. A standard 1/4-inch hardboard pegboard costs $15–$30 and mounts flush to wall studs with just a few screws. The beauty? You can rearrange hooks and shelves anytime your workflow changes.
Start by locating studs with a stud finder (a $10 magnetic one works fine for this). Mark where you want the pegboard centered over studs spaced 16 inches apart. Use 1/4-inch drywall anchors or lag bolts if studs don’t align perfectly with your pegboard edges. Mount the board with 1.5-inch wood screws every 16 inches along the perimeter and at any stud crossing in the middle, don’t skimp here, or you’ll get flex and sagging under load.
For better pegboard visibility and tool access, back it with 1×3 or 1×4 lumber (nominal dimensions, actual size is 3/4″ × 2.5″ or 3/4″ × 3.5″) to create standoff space. This lifts the pegboard slightly off the wall and lets hooks slide in easier. Add plastic or metal peg hooks rated for your tool weight: a claw hammer weighs 2 pounds, so a $0.50 hook rated for 5 pounds works fine.
Tool Racks and Magnetic Strips
If pegboards feel too open or you prefer everything within arm’s reach, tool racks mounted directly to the wall offer sleeker diy tool storage. A steel wall rack system runs $40–$150 depending on depth and width, and most hang from heavy-duty anchors rated for 50+ pounds.
Magnetic strips are genius for hand tools with steel bodies, chisels, wrenches, metal rulers. A 16-inch neodymium magnetic strip costs $12–$25 and holds surprising weight (often 10–20 pounds depending on the bar). Mount one above your workbench or on a tool cabinet side. Note: aluminum or plastic-handled tools won’t stick, so this works best if your kit skews toward all-metal hand tools.
Consider a Storage Home Depot: Discover visit to see wall-mounted rail systems that combine hooks, bins, and shelving in one modular setup. These hybrid systems let you customize as your collection grows.
Freestanding Storage Units
Wall space isn’t always available in smaller garages or workshops. Freestanding cabinets, tool chests, and shelving units offer flexible diy tool storage without fasteners or wall prep.
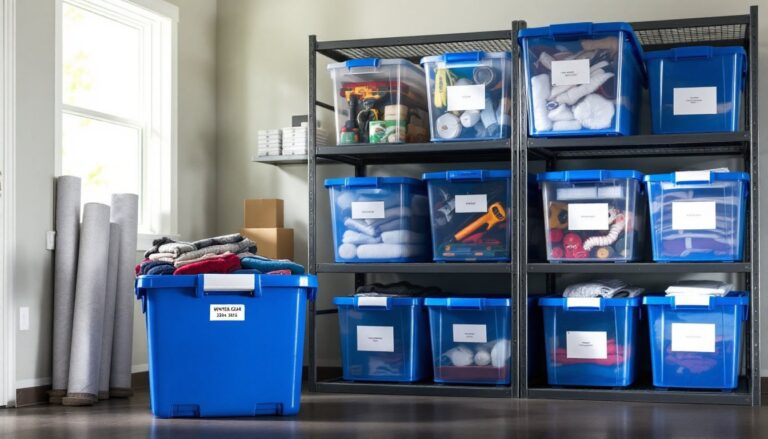
A basic 3-shelf metal garage shelf (36″ wide × 18″ deep × 72″ tall) runs $60–$120 and holds serious weight when anchored to wall studs or braced properly. For hand tool storage specifically, it’s overkill, but pair it with clear plastic bins labeled by tool type, fasteners, wrenches, chisels, etc., and you’ve got a system that stays organized without hunting. Each bin should be 6–8 inches tall and stackable.
Tool chests are the workhorse option: a rolling 26-inch steel chest with drawers costs $100–$400 depending on depth and gauge. Organize drawers with foam inserts or plastic dividers to prevent tools from sliding around. If you’re storing hand tools only (no power tools), a smaller 18-inch chest is lighter and takes up less floor space. Lock your chest if you have kids in the house or live in an area where garage theft is a concern.
For a middle-ground approach, heavy-duty plastic storage cabinets (often called “garage cabinets”) with adjustable shelves cost $80–$200 and require zero installation. Just roll it into place and start loading. These suit diy tool storage perfectly if you need portability, say, you move jobs or share a shop space.
Under-Bench and Drawer Organization
Your workbench is prime real estate. The space under and around it should work as hard as the top surface.
Under-bench tool storage racks or shelves keep frequently used hand tools within reach but off the work surface. Mount a 24-inch wide shelf 12 inches below the bench top using L-brackets rated for 25+ pounds. This gives you a staging area for tools mid-project without cluttering your actual workspace. For clever diy tool storage in tight spaces, a rolling tray on ball-bearing casters ($20–$40) slides under the bench and pulls out when needed, perfect for screwdrivers, bits, and small fasteners.
Drawer dividers transform a messy catch-all drawer into organized compartments. Plastic or wooden dividers ($10–$30 for a set) let you assign zones: wrenches here, screwdrivers there, pliers in another slot. Label each compartment with a label maker so anyone in the household knows where tools belong. This prevents the “where’s the needle-nose?” ten-minute hunt.
For drawers that take a beating, use a tool roll, a canvas or synthetic fabric roll with pockets that you can hang on the workshop wall or toss in a cabinet. A quality tool roll ($15–$40) protects edges and keeps hand tools separated and visible at a glance. Some DIYers swear by tool rolls for jobsite storage since they’re portable and dust-proof.
DIY Tool Storage Projects
If you want custom diy tool storage ideas tailored to your specific collection and workspace, building your own isn’t difficult and costs a fraction of pre-made systems.
Simple Wall-Mounted Tool Rack: Cut a piece of 3/4-inch plywood to size (24″ × 36″ is a good starting point), prime it, paint it your workshop color, then attach 1/4-inch rope or dowel pegs in a grid pattern. Drill 1/4-inch holes 4 inches apart, insert wooden dowel pegs, and secure with wood glue. Mount the whole panel on wall studs with 2.5-inch wood screws. Cost: under $25. Time: 2–3 hours. Popular Mechanics has detailed tutorials on custom pegboard builds if you want fancier designs.
Drawer Inserts from Scrap: Rip thin (3/4-inch) plywood strips and glue them into a grid inside a deep drawer, creating compartments. Use spray adhesive or a brad nailer to hold strips while the glue dries. Sand any rough edges. This clever diy tool storage approach costs almost nothing and fits your exact drawer dimensions.
Wall-Mounted Magnetic Tool Strips: Glue neodymium magnetic strips to the underside of a painted board, then mount the board to your wall studs. This holds steel tools without any hooks. Modern builds by Today’s Homeowner show this approach working beautifully in small spaces.
Hinged Tool Cabinet: Build a shallow cabinet (6–8 inches deep) from 3/4-inch pine, add shelves, and mount it on the wall with heavy hinges. Paint it to match your workshop or garage. Access tools by swinging the cabinet door open, great for hand tool storage out of sight when not in use. Requires basic carpentry (circular saw, drill, screws, and stain/primer/paint). Time: 4–6 hours. Cost: $50–$80 for materials. This is a step up in skill but very doable for someone comfortable with a home gym storage ideas or similar custom build.
For any DIY tool storage project, always use stud-finding hardware if fastening to walls, drywall alone won’t support the weight of a full tool collection. If studs aren’t positioned where you want them, heavy-duty toggle bolts or expanding anchors rated for 25+ pounds each work in a pinch, but studs are safer and more permanent.
Conclusion
Tool storage doesn’t have to be complicated or expensive. Whether you opt for a pegboard, a freestanding cabinet, or a custom build, the goal is simple: tools in clear sight, within reach, and protected from rust or damage. Start with what you have, measure your space twice, and pick a system that matches your workflow. Most diy tool storage setups pay for themselves in the time you save hunting for tools on your next three projects. Get it right, and you’ll never waste a Saturday morning digging through a toolbox again.