Table of Contents
ToggleWalking through the dollar store’s home section, you’ll find rows of plastic bins, clear containers, and stacking solutions that cost a fraction of what specialty organizing retailers charge. For homeowners on a tight budget, dollar store storage bins have become a practical workaround to the premium price tags of name-brand systems. These affordable organizers can tackle everything from seasonal clothing to pantry overflow, basement clutter to closet chaos. The real secret isn’t just buying bins, it’s choosing the right type for each space and knowing how to maximize their durability and functionality. This guide walks through the best dollar store storage bins for different rooms, practical tips for getting the most from them, and creative DIY upgrades that make budget bins look intentional.
Key Takeaways
- Dollar store storage bins offer an affordable way to organize multiple rooms for $20–$30 instead of spending $100+ on premium systems, making budget-friendly home organization accessible to all homeowners.
- Stackable plastic bins work best for closets and under-bed storage, while clear containers excel in pantries and kitchens—choosing the right type for each space maximizes functionality and durability.
- Measuring before purchase, labeling consistently, and accounting for moisture and temperature conditions are essential practices that transform dollar store storage bins from temporary solutions into reliable, long-term organization systems.
- Simple DIY upgrades like spray painting, adding contact paper, creating custom labels, and combining bins with complementary storage tools elevate the appearance and effectiveness of budget-friendly storage solutions.
- Dollar store storage bins typically last 3–5 years with normal indoor use when they’re not overstuffed or exposed to extreme temperature swings, making them a practical choice for seasonal items and everyday clutter.
Why Dollar Store Storage Bins Are a Smart Home Organization Choice
Dollar store bins offer an honest advantage: low cost paired with functional design. A homeowner can outfit an entire bedroom closet or pantry for $20–$30 instead of dropping $100+ on boutique systems. This affordability means you can experiment with organizational layouts without financial guilt, test what actually works for your household, and upgrade or replace bins as needs change.
The durability question gets asked often. Dollar store plastic bins, especially the stackable varieties, handle typical indoor use well. They’re not commercial-grade or meant for extreme temperature swings, but for bedroom closets, under-bed storage, and pantries, they perform reliably for 3–5 years with normal use. The real limitation isn’t the bin itself but how you treat it: overstuffing weakens hinges, and leaving bins in direct sunlight can make plastic brittle over time.
Another strength is variety. Dollar stores stock multiple bin styles, sizes, and colors within the same visit. This flexibility lets you tailor storage to different rooms, deep plastic bins for seasonal items, shallow clear containers for kitchen goods, and smaller organizers for drawer dividers. You’re not locked into one brand’s ecosystem or waiting for restocks.
Types of Dollar Store Storage Bins and What They Work Best For
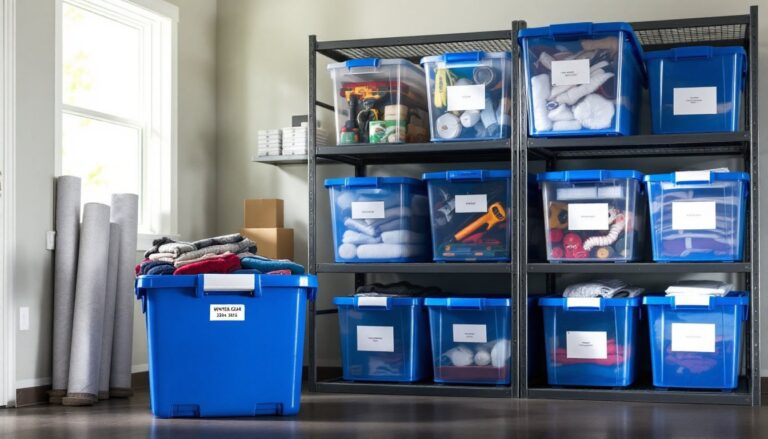
Plastic Stackable Bins for Closets and Under-Bed Storage
Stackable plastic bins, typically available in 10–20 liter sizes, are the workhorse of dollar store storage. Look for bins with solid bottoms, secure clip-on lids, and reinforced corners. The best models have handles molded into the sides for easy pulling, and lids that lock firmly enough to keep contents secure when stacked three or four high.
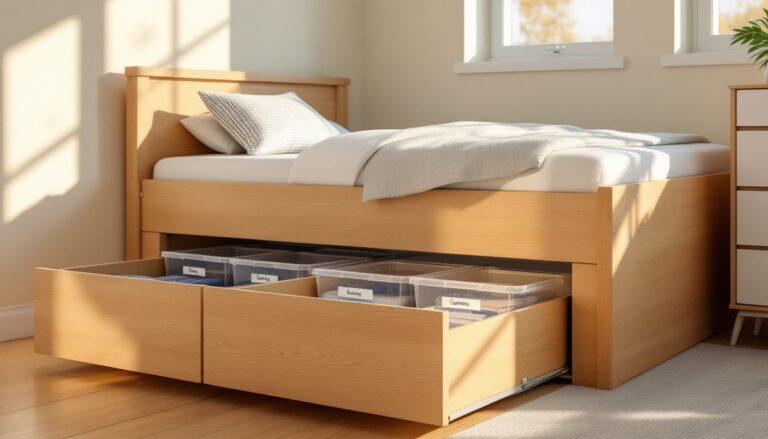
These bins shine in closets where vertical space matters. Stack seasonal coats, holiday decorations, or off-season clothing neatly, and the uniform size means no wasted shelf space. Under-bed storage is another ideal use case, the low profile of most dollar store bins (usually 4–6 inches tall) slides smoothly under standard bed frames. Label the front or side of each bin with masking tape and a permanent marker so you don’t have to pull every bin to find what you need.
One caution: don’t assume all stackable bins handle the same load. Thin plastic may bow under the weight of books or heavy textiles stacked four bins high. Test stacking by putting weight in the bottom bin first, if the corners flex, use only two or three tiers, or distribute weight more evenly across multiple bins placed side by side.
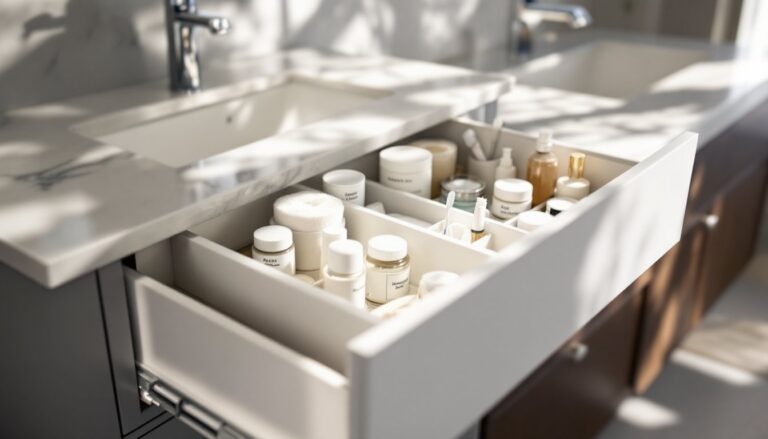
Clear Containers for Pantry and Kitchen Organization
Clear storage containers, often sold in sets of 2–4, let you see what’s inside without opening the lid, which saves time when cooking or meal planning. Dollar store clear bins work well for dry goods (flour, sugar, cereal, pasta), snacks, baking supplies, and small kitchen gadgets.
The key to success here is matching container size to what you’re storing. A tall, narrow container works better for pasta or dried beans than a wide, shallow one. Most dollar store clear containers come with snap-lock lids, which aren’t airtight but do keep dust and pests out effectively for pantry use. If you need true food preservation for long-term storage, airtight containers designed for bulk food storage are worth the extra investment.
Clear containers also prevent overbuying at the grocery store, you can see exactly how much cereal or flour you have left. Stack them vertically on shelves or use small risers to create tiered storage in deep pantry shelves. Label the top and front of each container with the contents and (if relevant) the expiration date.
Practical Tips for Maximizing Dollar Store Storage Solutions
Measure before you buy. Bring a tape measure to the dollar store. Know the exact depth of your closet shelf, the height under your bed, and the interior dimensions of your pantry. A bin that’s too deep won’t fit: one that’s too tall won’t stack. Five minutes of measuring saves frustrating returns or a wasted trip back to the store.
Use dividers and liners inside bins. Dollar store bins work even better when you add internal organization. Shoe boxes, cardboard dividers, or small fabric organizers create compartments inside larger bins, preventing items from shifting around and making retrieval easier. This is especially useful for seasonal clothing, divide one large bin into sections for sweaters, scarves, and gloves.
Label clearly and consistently. Masking tape and a permanent marker cost almost nothing and transform bin organization from a guessing game into a functional system. Write what’s inside on the front and side of each bin at eye level. For color-coded organization, use colored tape or markers to group bins by category (holiday décor in red tape, seasonal clothing in blue, etc.).
Account for moisture and temperature. Dollar store plastic isn’t ideal for humid basements or uninsulated attics where temperature swings are extreme. In those spaces, consider higher-quality bins with better gaskets, or store only items that won’t be damaged by temperature and humidity fluctuations. In controlled indoor spaces (climate-controlled bedrooms, kitchens, living areas), dollar bins work perfectly.
Check bins for defects before leaving the store. Test lids to ensure they snap on firmly, flex the bottom to ensure it’s solid, and inspect corners and seams for cracks or rough edges. Five seconds of inspection in the aisle beats discovering a cracked bin at home.
Creative DIY Upgrades to Personalize Your Dollar Store Bins
Dollar store bins are blank canvases, and a few simple upgrades can make them feel intentional and cohesive with your home décor.
Paint or stain the exterior. Plastic spray paint designed for outdoor use works on dollar store bins and dries quickly. Spray multiple light coats rather than one heavy coat to avoid dripping, and allow proper drying time between coats. This is especially effective for visible storage in living rooms, bedrooms, or offices where bin aesthetics matter. Neutral grays, whites, and warm earth tones coordinate with most décor and hide dust better than bright colors.
Add decorative contact paper or fabric. Self-adhesive contact paper or fabric adhered with spray adhesive can cover the exterior of bins for a custom look. This technique works well for bins stored on open shelves where appearance counts. Choose patterns or colors that complement your room’s palette. Even simple washi tape applied around the edges of bins adds visual interest without much effort.
Create custom label designs. Instead of plain masking tape, print custom labels on kraft paper or white label stock and adhere them with glue stick or double-sided tape. Include a category label, an optional picture (useful for kids’ rooms), and space for quantity or date added. This approach feels more intentional and is easier to update if storage contents change. Resources like Martha Stewart’s organization guides showcase labeling ideas that elevate basic plastic bins.
Install bins on wall-mounted shelving. Instead of relying solely on closet shelves or floor placement, mount floating shelves in a hallway, entryway, or mudroom and arrange bins there. This uses vertical wall space that’s often empty and creates a gallery-like storage display. Use brackets rated for the combined weight of bins plus contents, and ensure bins are sized to fit snugly on the shelf.
Combine bins with other storage methods. Dollar store bins work best alongside other budget organizing tools, tension rods for hanging items, hanging shoe organizers, lazy Susans for rotating pantry access, and stackable shelving units. Layering different storage types creates a more polished and functional system than bins alone. Real Simple’s organizing strategies illustrate how combining multiple simple tools creates greater impact than relying on one solution.
Conclusion
Dollar store storage bins solve a real problem: getting organized without very costly. The key is selecting the right bin type for each space, maintaining realistic expectations about durability, and investing a little time in prep work and labeling. With intentional placement and modest DIY upgrades, budget bins feel like a thoughtful organizing solution rather than a temporary patch. Start with one room, a closet, pantry, or bedroom, measure carefully, and expand your system as you discover what works for your home and habits.